Configuring a New Site
In order to use Dreamweaver as your IDE you'll need to
first configure a new site.
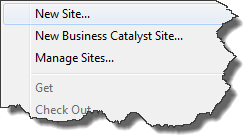 Figure 1 -
Dreamweaver Site menu with the New Site... option selected.
Step 1 On the Dreamweaver menu bar click on the
Site
menu to open it and then select the New Site... option from the menu that
appears as seen in figure 1.
Step 2 When the Site Setup for Unnamed Site
dialog box opens, the
Site tab on the left of the dialog box should be selected, if not click to
select it.
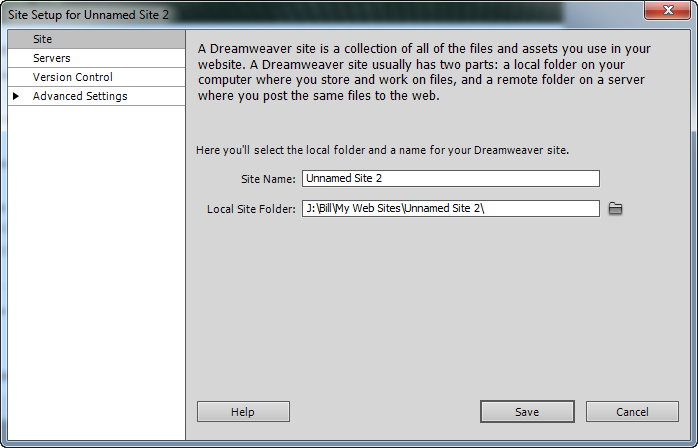 Figure 2 - Dreamweaver Site Setup for Unnamed Site dialog box.
Site Settings
Step 3 In the Site Name field type your course number (CSIS115A, CSIS125A, CSIS786, etc) and use the
Browse for
folder button to locate your CSIS 115A, CSIS125A, or CSIS 116B data files on your computer
as shown in figure 3.
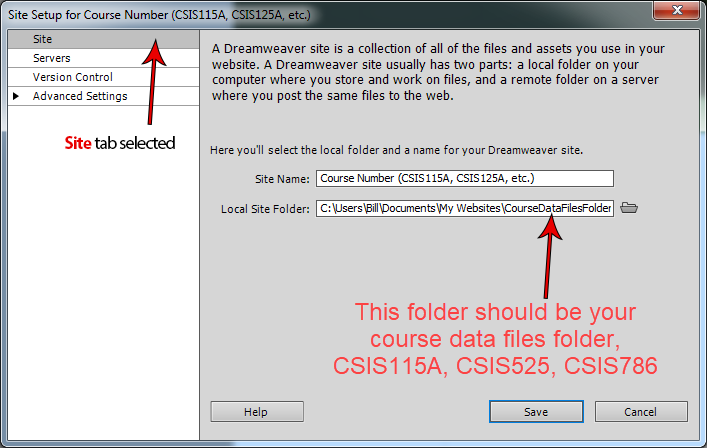 Figure
3 - Dreamweaver Site Setup for Unnamed Site dialog box
with the Site Name and root folder location information typed in.
Server Settings
Step 4 Next click on the Servers option (under
the Site option).
Step 5 Click the + button to
add a new server configuration. You will configure the connection information for the
Student Web server on the screen that appears.
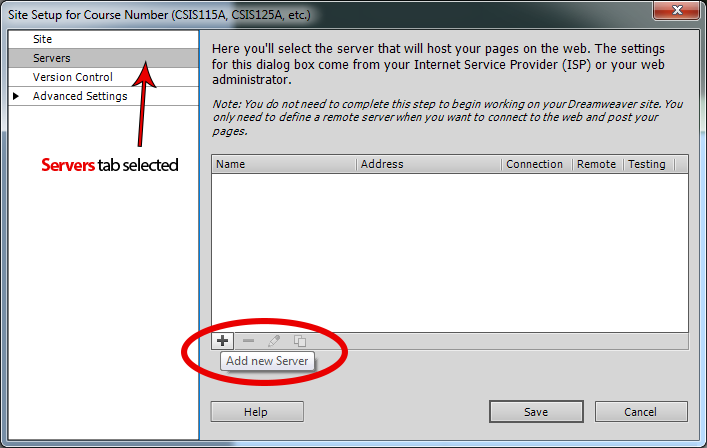 Figure
4 - Dreamweaver Site Setup for Unnamed Site dialog box with the Servers
option selected.
Basic
Step 6 You should see two buttons at
the top of the server configuration screen, Basic and Advanced. The
Basic button should be selected (darker). Fill in the blanks on the Basic form by typing the following information:
-
Type Student Web Server for the
Server Name
-
Connect using:
FTP over SSL/TLS (implicit encryption)
-
The FTP
Address is: ia.msjc.edu
-
Your Username is your
7-digit student ID number
-
Your Password is the same password you use to login to Canvas.
-
Check the Save
checkbox to save your password
(this will save you from having to type your password to log in all the
time)
-
For Root Directory:
(leave blank)
-
For the Web URL type http://ia.msjc.edu/your
1st initial + last name
Figure 5 shows an example configuration, your settings should have your Canvas login credentials for the Username and Password.
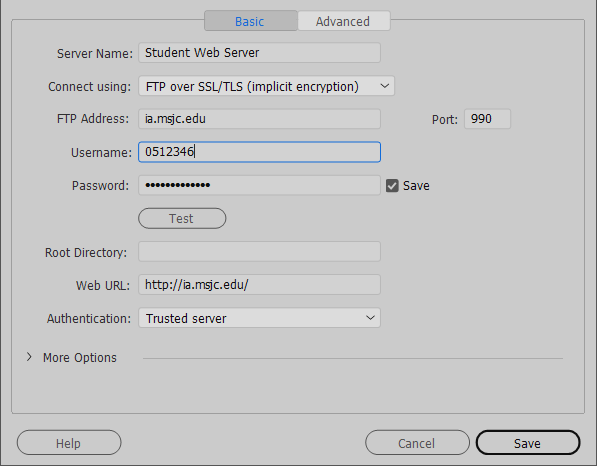 Figure
5 - Dreamweaver Site Setup Server Basic settings dialog box with
settings entered for the Student Web server.
Step 7 Click the Test button to confirm that your settings are correct.
 Figure 6 - If you have typed your settings correctly on the Basic screen, then a confirmation should appear when you click on the Test button indicating a successful connection to the server.
Advanced
Step 8 Click on
the Advanced button at the top and place a check in the
Automatically
upload files to server on Save check box. This will save you from having to
manually upload your files to the Student Web server.
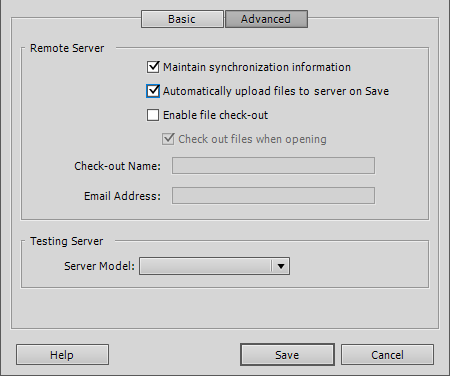 Figure
7 -
Servers Advanced dialog box with Automatically upload files to server on
Save checked.
Step 9 Click the
Save button and you should see your newly added server
added to the server's list on the Servers screen.
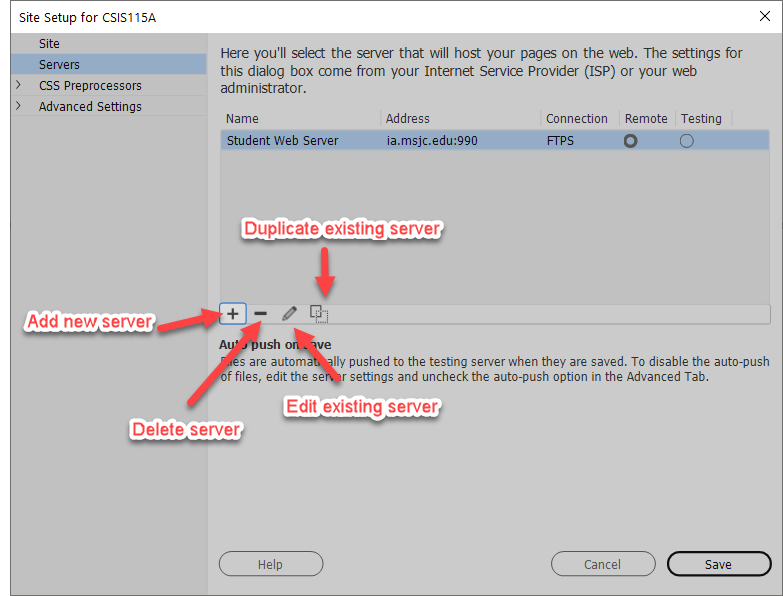 Figure
8 - The CSIS 115A/CSIS 125A Web site setup after the Site and Server configuration
steps are completed.
If you need to make changes to your server configuration, select the server from the server's list and click on the pencil
icon as shown in figures 8.
Step 10 Click
Save
at the bottom of the Site Setup dialog box and you have finished
configuring a new site. Now, every time you create a new file and save it
or edit a file and save it, the file will be automatically uploaded to the
Student Web server for the whole world to see.
Verify Your Files Published Successfully
Once you have successfully published your folders and
files to the Student Web server you need to verify that they can be accessed
from the Web server using a Web browser and that it displays correctly.
For more information on how to do this review the
URLs tutorial. This tutorial explains how URLs work and how you submit your assignment URLs for scoring.