Introduction
If you are using Visual Studio as your Web development IDE, you
will need to configure Visual Studio with the Student Web server's FTPS
information in order to be able to publish your local folders or files to the Student Web server. In order to configure Visual Studio to publish your Web resources you will need to setup Web One Click
Publish. This tutorial will teach you how to do that.
NOTE: You will need to have the AWS Client VPN installed/configured on your development computer and running before you will be able to enable FTPS publishing using Visual Studio's Web One Click Publishing. See AWS Client VPN for instruction.
⇑ Table of Contents
Configuring A Web One Click Publish Publishing Profile
In order to be able to
publish your files using Web One Click Publish you must first configure a
Publishing Profile. One of the advantages of having publishing profiles is
that you can have many of them which makes it very easy to quickly choose
the Web server you want to publish to.
 Figure 1 - The Web One Click Publish toolbar.
Adding Web One Click Publish to the Toolbar
Step 1: If you don't already see the Web One Click Publish toolbar grouped with the other tools on your Visual Studio toolbar above the Document window (see figure 1), then you will first need to add the Web One Click Publish toolbar to the Visual Studio collection of toolbars
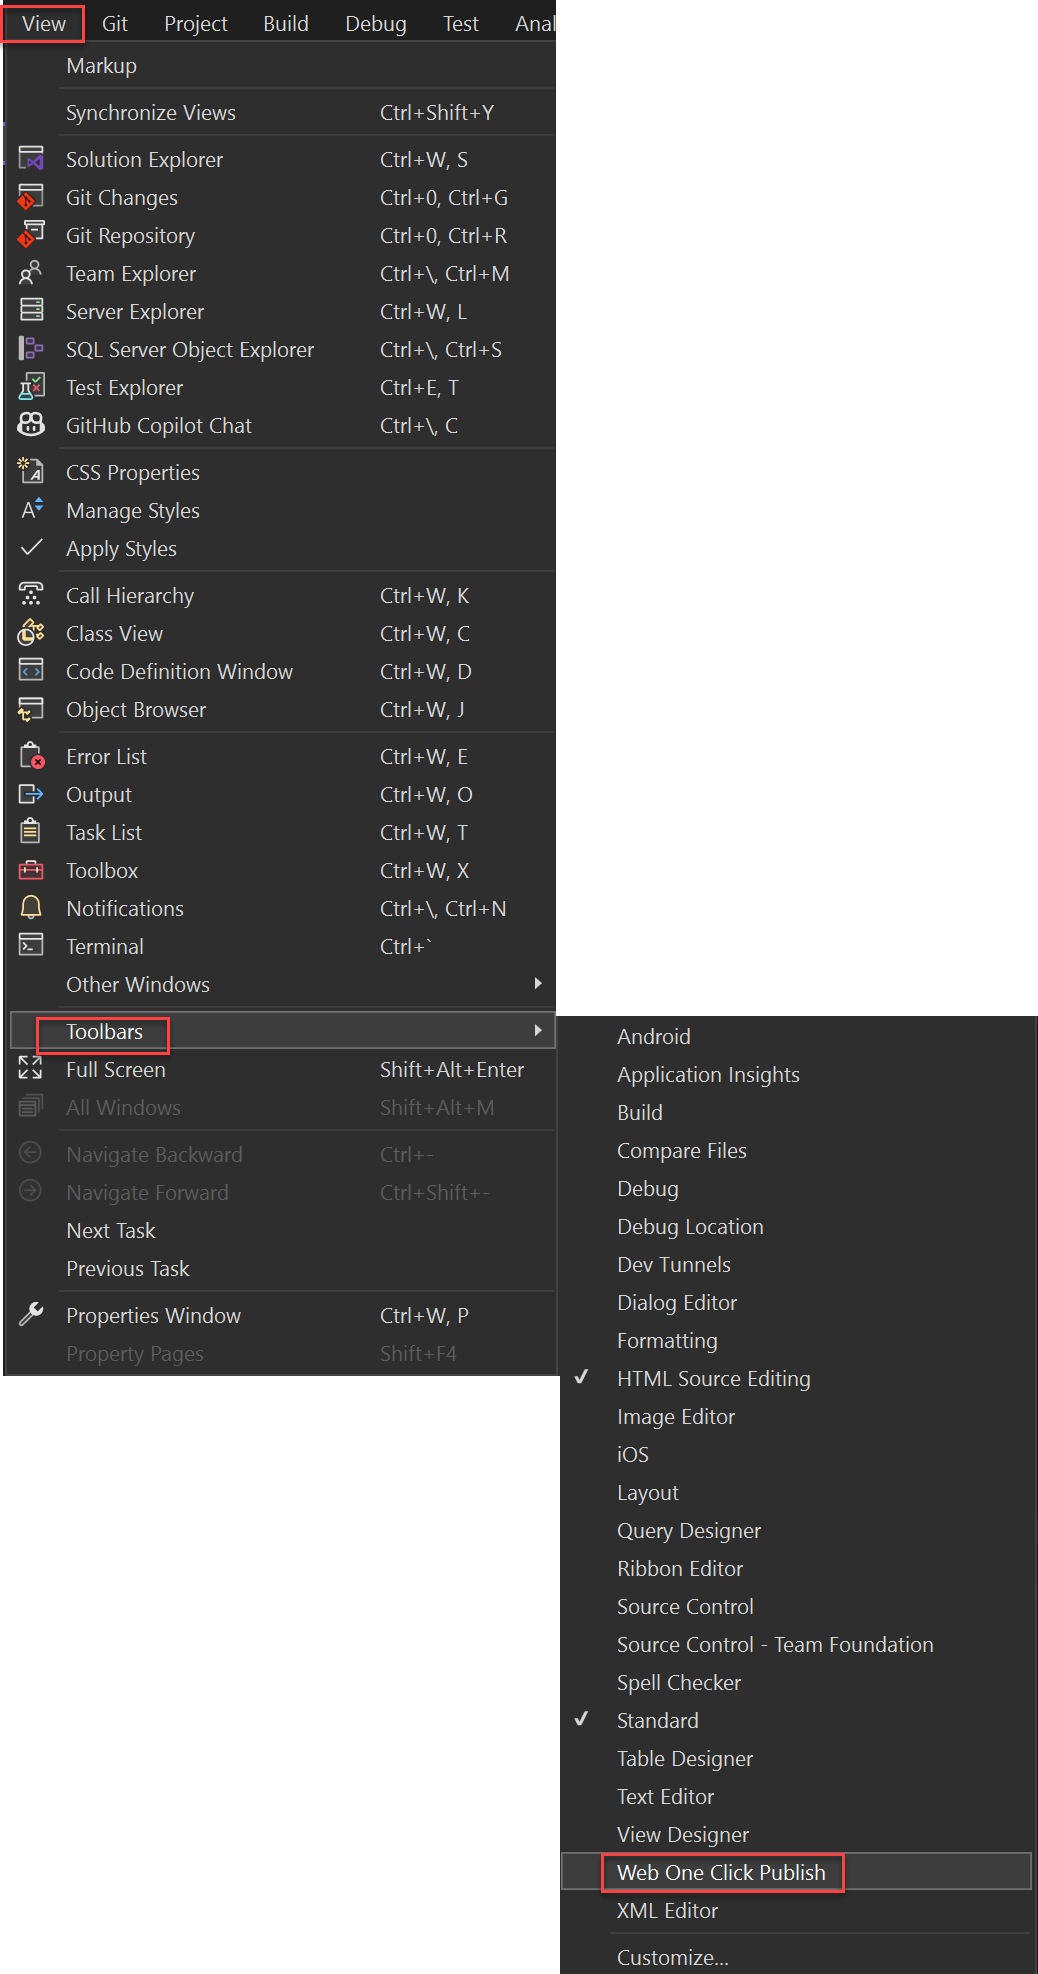
To add the Web One Click Publish tool, open the View
menu from the Menu bar, then rest your mouse over the Toolbars option and click on the
Web One Click Publish option from the list of options in the flyout menu that appears.
 Steps for opening the Web One Click Publishing toolbar (click image for larger view).
Creating a New Publishing Profile
 Figure 2 - The Web One Click Publish toolbar displaying the <New Profile...> option.
Step 2: If this is your first time configuring a publishing profile for your Web site, then on the Web One Click Publish toolbar click the drop-down arrow
to the right of the text that reads "Create Publish Settings" and select
<New
Customer Profile...> from the menu that appears as shown in figure 2.
If you want to modify an existing Web One Click Publish profile then click on Edit Publish Profiles button (the gear icon
 ) on the Web One Click Publish toolbar.
Select the profile you want to modify, then click the down arrow for More Actions and click Edit.
) on the Web One Click Publish toolbar.
Select the profile you want to modify, then click the down arrow for More Actions and click Edit.
Step 3: In the Target pane that appears, select FTP/FTPS server and then click the Next button (see figure 3).
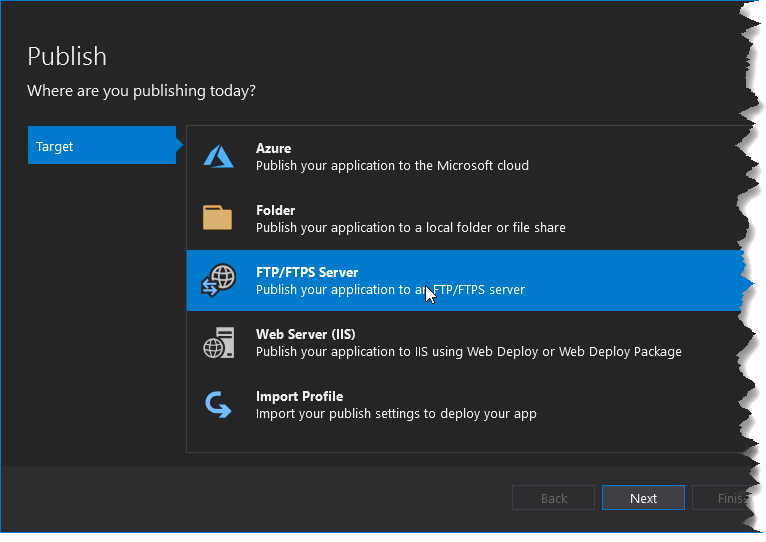 Figure 3 - the Publish Target pane.
Step 4: Complete the rest of the settings
for the Publish Web Connection tab using the information provided on the FTP tutorial page. Click Finish to complete this step (see figure 4).
 Figure 4 - The Connection pane of the Publish window with all of the necessary settings configured.
Step 5: (Only necessary if Web One Click Publish is not working) Once you have completed the FTP configuration, if you are not able to publish your Default.html file, there must be a problem with your FTP configuration. To edit the FTP configuration click the down arrow of the More Actions menu and choose Edit to return to the editing panes. On the left-hand side click Connection to return to the FTP Connection editing pane. Make any necessary changes and then click the Validate Connection button. A green check should appear; if it does not you still do not have the configuration correct. Remember that the password is your MSJC password. If it is still not working, email your instructor a screen capture of your FTP Configuration pane
(see figure 5).
 Figure 5 - the Connection pane of the Publish window with all of the necessary settings configured.
Step 6: Once you have completed configuring or editing your Publish Profile, click the X on the tab located at the top left of the Publish window to close it (see figure 6).
 Figure 6 - Displaying the X on the Publish window tab for closing the Publish window.
⇑ Table of Contents
Figure 6 - Displaying the X on the Publish window tab for closing the Publish window.
⇑ Table of Contents
Publishing Your Files to the Student Web
Server
In order for the rest of the world to be able to view your
Web creations you need to publish them to a Web server. For your CIS classes
of course will be publishing to our Student Web server.
Publishing a file or folder using Web Publishing One Click is as
easy as right-clicking on the file or folder you want to publish in the Solution Explorer and then choosing
the Publish itemname option from the context menu that
appears.
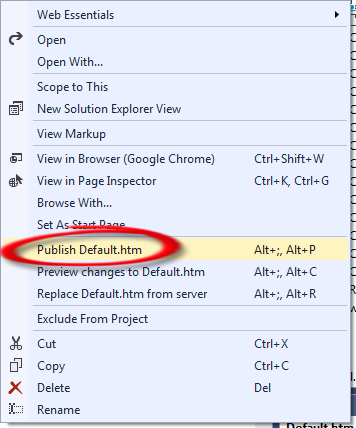 Figure 7 - Publish default.htm is selected in the context menu that appears after right-clicking on the default.htm file in the Solution Explorer.
You can confirm that your file(s) or folder(s) have been successfully published by viewing the Web Publish Activity window which opens below the Document window by default when file(s) and/or folder(s) are published using Web One Click Publish.
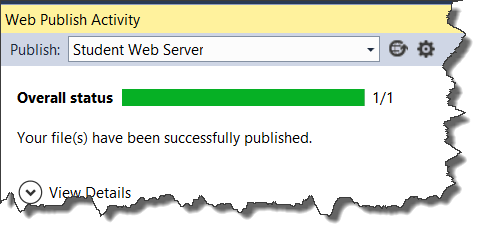 Figure 8 - The Web Publish Activity window showing that the file(s) were successfully published.
Note: If you don't see the Publish itemname option when you right-click a file or folder in the Solution Explorer it may because your Web Publish Activity window is not open. For help opening the Web Publish Activity window view Opening the Web Publish Activity Window.
⇑ Table of Contents
Editing Your Student Web Server Publish Profile
You may need to make a change to your Student Web server Publish Profile if every time you attempt to publish a file, the Connection tab of the Publish dialog box opens. If their is an error in your connection configuration the dialog box will appear each time you try to publish. Even after you make the proper corrections and complete the publish operation, you will still need to edit the Student Web server Publish Profile because just typing the proper configuration during a publish operation does not save those changes to your Website's project configuration file in Visual Studio. When this occurs, you will need to edit the Student Web server Publish Profile Connection properties using the following procedure.
If you need to make changes to your Student Web server Publish Profile, tap or click on the gear looking icon in the Visual Studio toolbar located on the right of the Web One Click Publish tool.
Step 1:
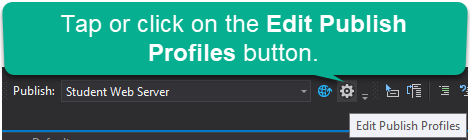 Figure 9 - the Edit Publish Profiles button
Step 2: When the Publish dialog box appears, tap or click on the Connection tab on the left-hand side of the dialog box.
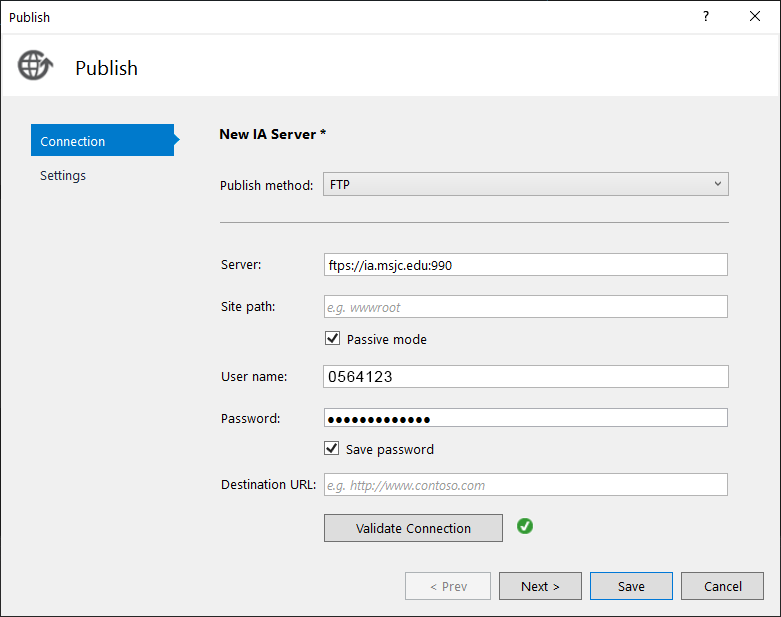 Figure 10 - the Connection pane of the Publish window.
Step 3: In the connection dialog box double-check all the settings and tap or click the Validate Connection button to verify your settings are correct, if the green check appears, tap or click the Close button and the publish operation should complete successfully. If you don't get a green check after tapping of clicking the Validate Connection button, then one of your settings is not correct. In that case take a screenshot of your Publish Connection screen and email it to your instructor.
⇑ Table of Contents
Opening the Web Publish Activity Window
To open the Web Publish Activity window first open the View menu from the Menu bar, then locate and rest your mouse over the More Windows option and click on Web Publish activity from the fly-out menu that appears.
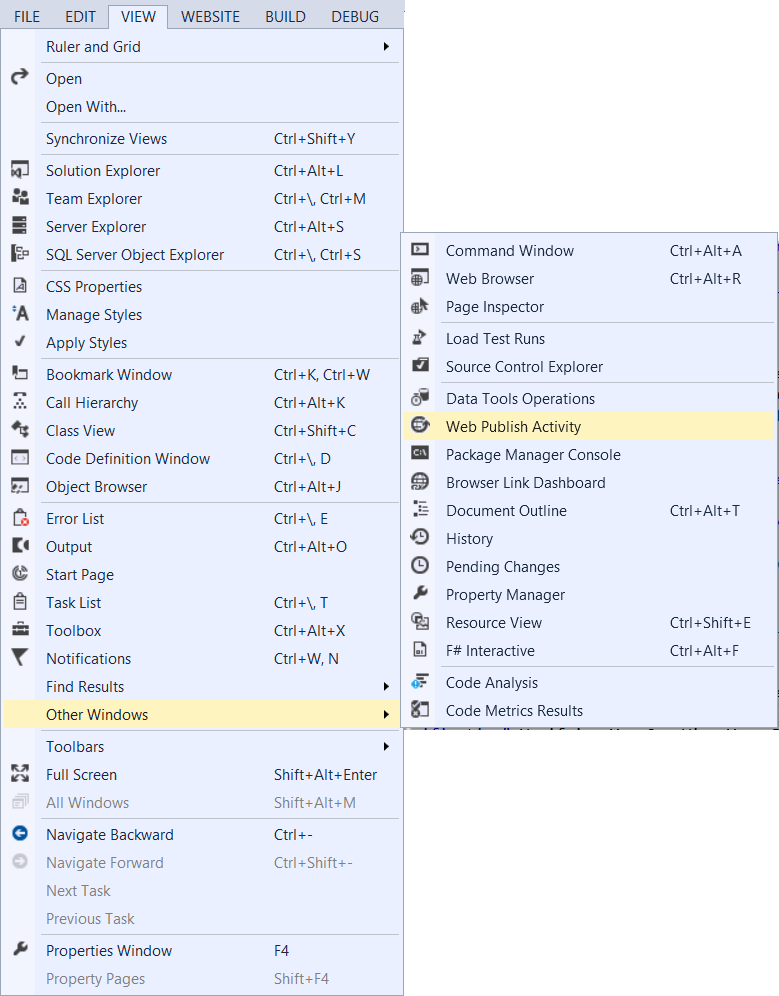 Figure 11 - How to open the Web Publish Activity window from the View menu.
⇑ Table of Contents
Figure 11 - How to open the Web Publish Activity window from the View menu.
⇑ Table of Contents
Verifying You Can View Your Published
Assignment on the Student Web server
Once you have successfully published your folders and
files to the Student Web server you need to verify that they can be accessed
from the Web server using a Web browser and that it displays correctly.
For more information on how to do this review the
What is a URL tutorial.
⇑ Table of Contents