 Zipping Files
Zipping Files/Folders On a MAC Computer
Creating a zip file on a MAC computer is quite easy. First you need to select all of the files that you want to add to your zip file. You can do
this by holding down the Shift key on your keyboard and clicking on each file you want to add to the zip or you can lasso your files by holding
down the left mouse button when the pointer is above and to the left of your files and then click your left mouse button and hold it down as you
drag your mouse down and to the right to lasso all of the files you want to include in your zip file. Once you have the files selected,
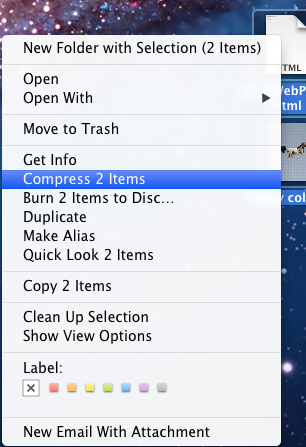
right-click on any one of the selected files and the Context menu you see in figure 1 will appear. Move your mouse down to the Send to option and click, a flyout menu will appear. From the flyout menu choose the Compress (number of) Items option.
 Figure 1: The Compress (number of) Items option highlighted in the Mac context menu.
A new folder will be created and it will have a zipper on its icon and it will be named Archive.zip - this is your zip file which contains a copy of all of the files you had previously selected (see figure 2).
 Figure 2: Image of a zipped folder on a Mac.