 TextEdit
Open TextEdit
To create an HTML page on a MAC you will need to use the
TextEdit application that comes with the MAC OS X operating system. To open the
TextEdit application, open the MAC Finder, click on Applications and locate the
TextEdit application. Double click on the
TextEdit icon to open the TextEdit application. See figure 8.1.
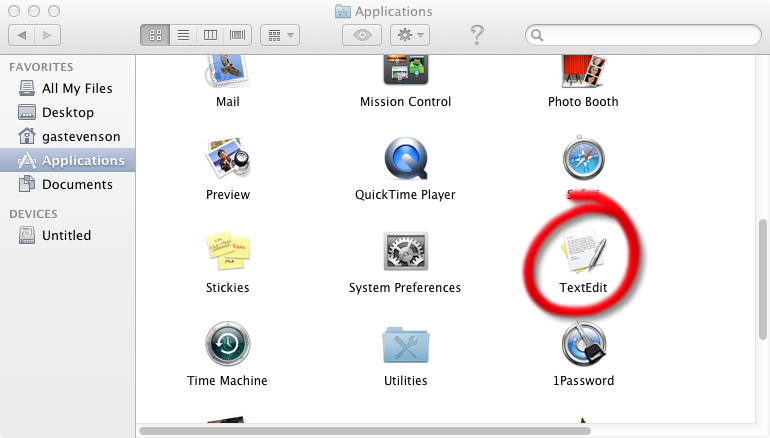 Figure 8.1: The Applications window in the MAC Finder with the TextEdit application
highlighted.
Once the TextEdit application opens you will need to change the editing format from Rich Text to Plain Text. To do this click on the Format menu to open it and then click on the Make Plain Text option to switch from the Rich Text format to the Plain Text format (see figure 8.2). If you don't see the Make Plain Text option and instead the option reads Make Rich Text, then you are already using the Plain Text format and no change is needed, just click on the Format menu again to close it.
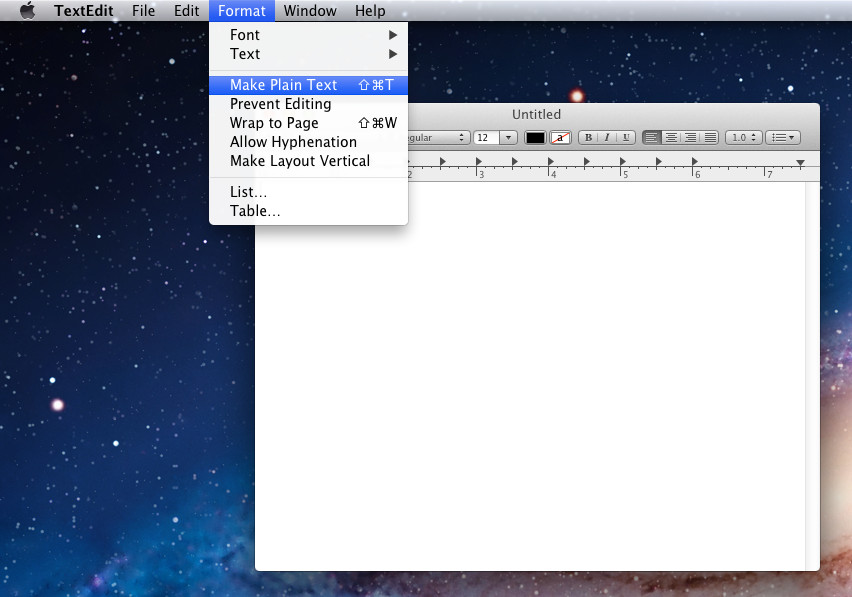 Figure 8.2: The Make Plain Text option highlighted in the Format menu of the TextEdit
application."
To
confirm that your TextEdit program is
correctly configured to allow you to write HTML code and not format it as
Rich Text view figure 8.3. Your TextEdit editing
window should now look like the editing window you see in figure 8.3 with
no formatting toolbar and no ruler appearing at the top of the editing
window.
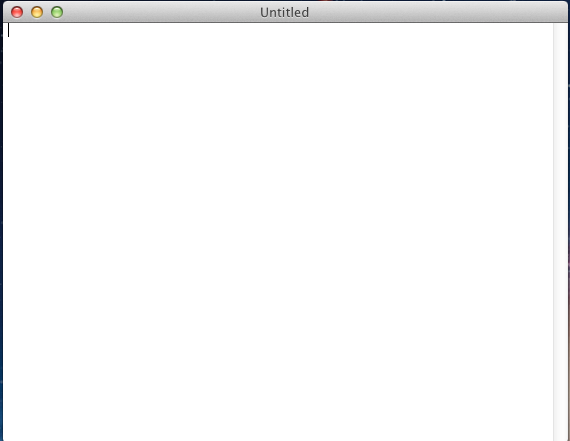 Figure 8.3: The TextEdit editing window configured for Plain Text editing.
Save Your File
Next save your file by clicking on the TextEdit File menu and choosing Save. When the Save dialog box opens type "FirstWebPage.htm" as your file name. Notice there are no spaces in the file name. I highly recommend that you don't put spaces in the names of any file (HTML files, image files, etc.) that will be viewed in a Web browser. This is because not all Web browsers (mainly older ones) support file names with spaces in them. I would also recommend you save your file to your Desktop to make it easy to find later. You can do this by clicking on Desktop under Favorites in the left column of the dialog box. Once you have typed in your file name and selected where to save your file to, click on the Save button in the lower-right corner of the dialog box to complete the file save procedure.
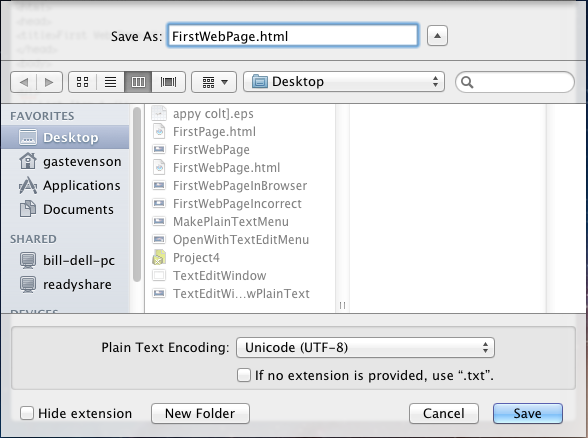 Figure 8.4: The TextEdit Save dialog box.
Viewing Your HTML Icon
In the newer versions of the MAC OS X operating system your newly saved file will appear with an icon that has the word HTML written across, just like the one you see in figure 8.5.
 Figure 8.5: MAC HTML icon.
Editing Your HTML File
If your file is still open in TextEdit with the format set to Plain Text then you can begin editing your HTML file immediately. If you have closed your HTML file and want to re-open it in TextEdit, right-click on the HTML icon, move your mouse pointer over the Open With option in the menu that appears and then choose the TextEdit option from the flyout menu. Once you have typed in your HTML code and saved your file, if you want to see what your HTML page will look like in a Web browser, just double-click on the HTML icon, it should open in your default Web browser (most likely Safari) and display your HTML page as a Web page. This is how you should view your Web page before you submit it to your instructor. What you see in your Web browser will look the same no matter what Web browser it is viewed in later. Make sure everything looks correct in your Web browser before submitting your assignment.
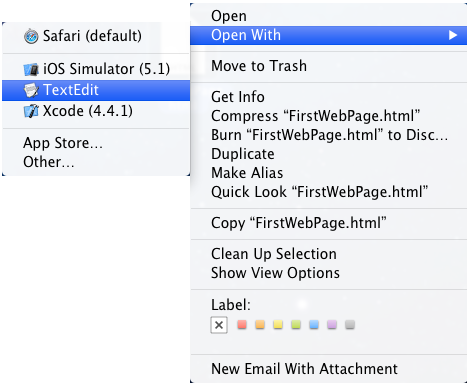 Figure 8.6: Using the Open With option to select TextEdit.